It certainly can be overwhelming to think about landscaping. In regards to setting up Garden Structures and the like, we can help you plan your project without the headache. Follow these simple steps below to begin mapping out your vision and when you’re ready to make it happen- you can give us a call.
Draw Up a Map
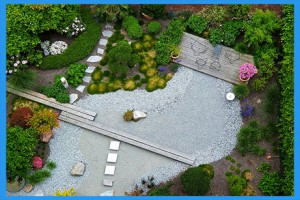
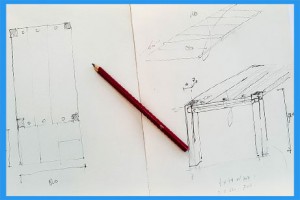
By drawing a map of your yard, you can conceptualize what you really have to work with. You can create just a rough map using a large notepad or sketchbook and a pencil and imagine your property from a bird’s eye view. Sketch out your yard and be sure to include things like trees, shrubs, garden areas, fences, property lines, utility lines, paved areas, ponds, walls, pools, patios, buildings, and other permanent fixtures. You may also want to use a compass to find the direction of north and mark it on your rough map.

Take Measurements of Permanent Objects
Once you’ve located and identified certain features of your yard that you would like to remain fixed, take the time to measure them. By measuring your house, length of fences, spread of shrubs, walkways, gardening areas, tree drip lines, and the dimensions of your pool, you’ll have a better idea of the space you have to work with. You may also want to measure doors, windows, outside faucets, vents, lights, and electrical receptacles. Be sure to include these measurements on your map.

Accurately Measure Locations
It’s important to get accurate measurements when determining a location in which you wish to landscape. You can do this by using items like stakes and string to mark a straight line on the edge of your property. Be sure to put the stakes in the far corners to get the most accurate measurement and keep the tape measure at a 90° angle when measuring the corners of your property to the nearest corners of fixed objects like trees, pools, and your house. Make measurements from other boundaries around your yard to confirm the accuracy of your measurements as well. Mark these measurements on your map.

Create a Revised Draft
When you have all of the measurements needed to determine what your property currently looks like and the amount of space you can use to adjust the landscape, take your measurements and create a revised draft on graph paper. You can use a pencil and ruler to transfer all of the information you’ve acquired. A good rule of thumb would be to assume that 1 inch on the graph paper represents 4 feet for a small yard or 20 feet for a larger yard.

Develop a Landscape Overlay
Now that you have a revised version of your yard all mapped out with accurate measurements, you can begin to plan where new items may go. To do this, you can take your revised map and tape it down to a table. (If you’re more computer savvy, you scan or take a picture of your map and import it into a photo-editing program that will allow you to use multiple layers.) Lay a sheet of tracing paper over your revised map to create a new layout on top of it. You can use different sheets of tracing paper to create multiple themes or different methods of landscaping, such as determining different opportunities in regards to shade, sunlight, views, slopes, traffic patterns, gardens, and structures.

By using this method to map out your yard, you can alleviate much of the stress that comes when you’re trying to add additional pieces. For the items you wish to add, be sure to research the adequate amount of space for those items. Some gardens require more space than you may have realized. Our Garden Structures at Fifthroom.com have a full description and variety of measurements to meet your outdoor space needs. Most of our products are also customizable. Our Award-Winning Design Wizard allows you to design your own structure with the help of visuals without having to commit. Visit our site at Fifthroom.com or give our friendly Project Advisors a call at 1-888-293-2339 to learn more!

0